Reducing the echo in my home office - Building the Acoustic Panels
Reducing the echo in my home office with home made acoustic panels.


This is the second part my blog series on Reducing the Echo within my home office in terms of audio. I wanted to share how I put my panels together and some of the lessons I learnt that might help you if you decide to do something similar in the future.
The Frame
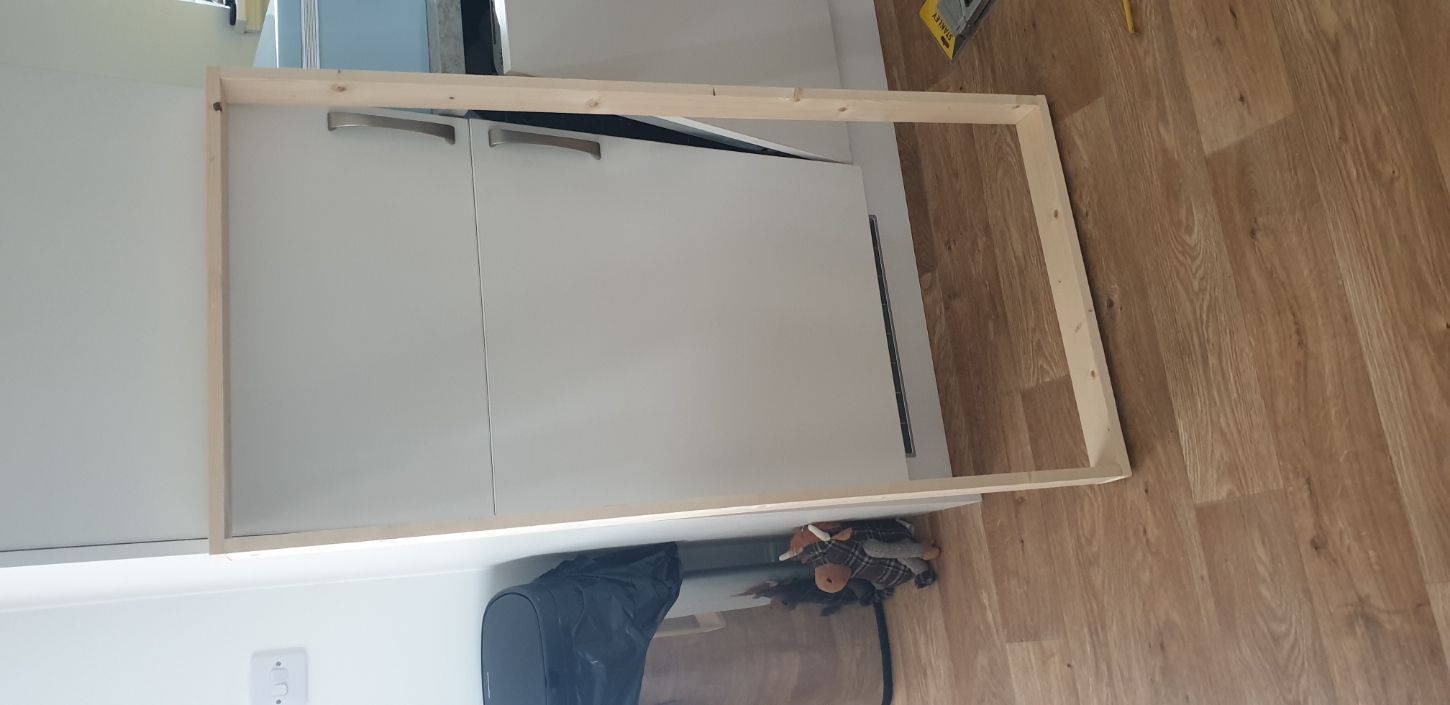
I put together a very simple frame to hold my Rock Wool, I measured it so that it was the width and length of the Rock Wool as it came. My frame was also (just) deep enough to hold two panels of Rock Wool. My wood was 70mm in depth and each Rock Wool panel was 40mm in depth. So that is something to take in to account when purchasing wood and Rock Wool. There are different thickness of Rock Wool that you can get, be mindful of how think you want it in terms of on your wall. You might not want something sticking out to much depending on the size of your room etc.
The Rock Wool
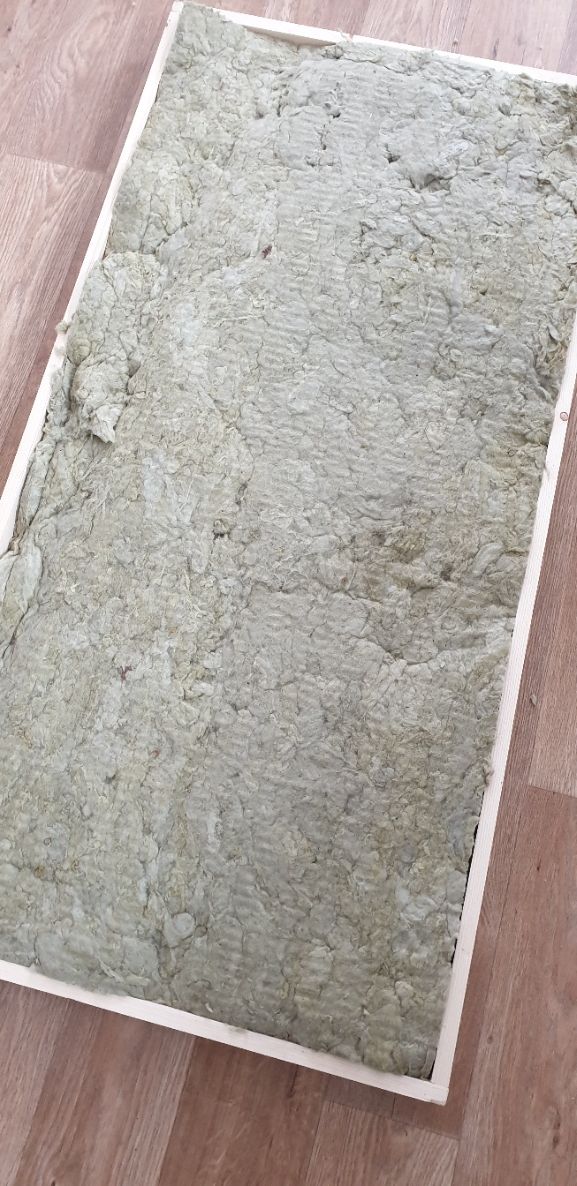
There are all kinds of warning about handling Rock Wool, so I was very careful to wear long sleeves, gloves and wear a disposable dust mask. Obviously this is up to personal preference but I didn't want to take any risks. What I did realise was the Rock Wool was quite flimsy and I ripped a couple of pieces while removing from the packaging, but that wasn't a major issue. I was also sure to get the Rock Wool into the correct place, and made sure it was relatively flat before fitting the fabric. The last thing you want to do is get the panel built and have an ugly shape sticking out of your frame.
Fabric
I forgot to take a picture of this section when I was putting it together. I bought some cheap, plain fabric from IKEA for the back of the frame and I stretched that across the frame, to basically keep the Rock Wool in place. When I was building one of the frames I did stretch that material a bit to much, so be aware of keeping the tension there but not to much. I secured the fabric with a staple gun.
For the front of the frame I had bought some patterned material, one with a geometric pattern and one with some butterflies and ladybugs. Before I fitted the front fabric to the frame, I ironed it to make sure there was no really bad wrinkles in it. A lot of the YouTube you will see and hear people saying you don't need to iron it as stretching the fabric will remove the creases however I didn't want to risk it and taking those 10-15minutes to iron the fabric gave me peace of mind.
Fitted fabric with a pattern is a bit of a worry, if I am honest, I was worried when stapling the fabric down that the pattern was getting warped and wouldn't look right once I was finished, so having plain fabric might be a better idea.
Corners!! When folding the fabric around the corners of the frame, make sure you take extra time and care as these corners will be on show. So if your the kind of person who at Christmas asks your other half to help with the present wrapping to do a neat job, call them in to help you here.
When I built the first frame I used my husband to staple the fabric while I stretched it however on the second two I'd figure out the process and ended up doing it myself. But having a helper here might be good.
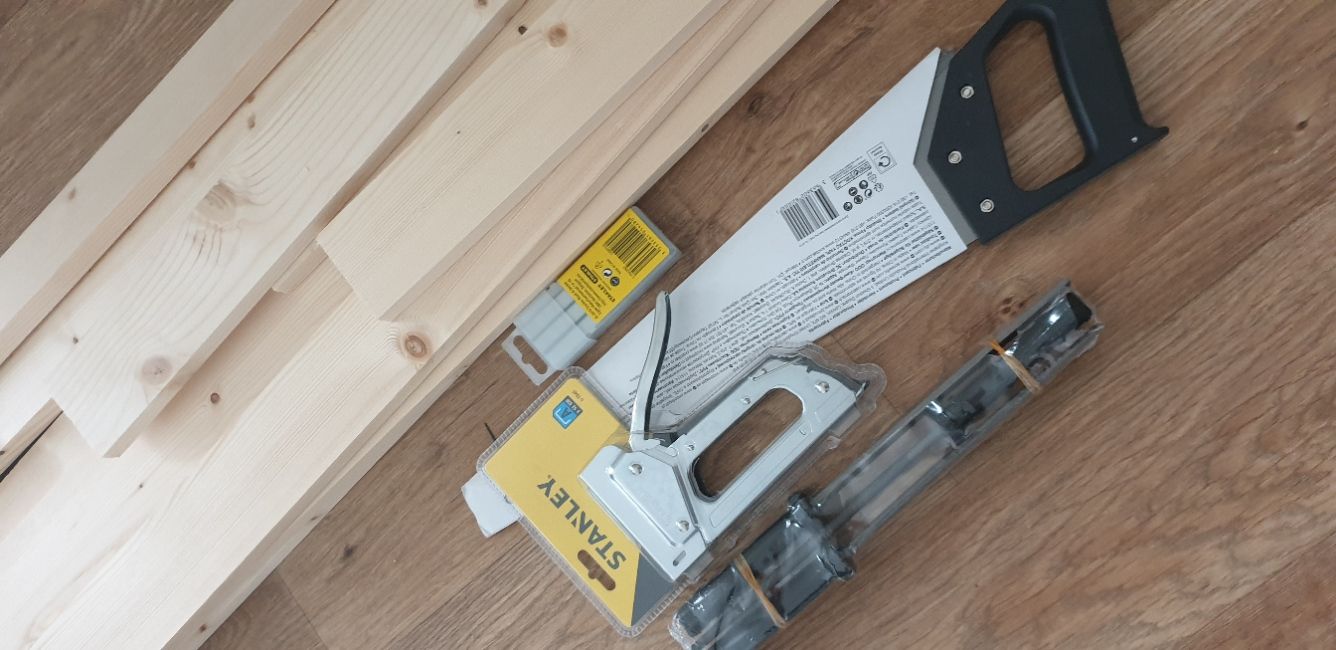
One thing I hadn't bargained for at all was how hard it would be to cut the fabric, I'd definitely recommend you get some fabric scissors to make your life easier and also end up with a a bit finish on the edges of your fabric.
Staple Gun
One thing I want to note here is I didn't have a staple gun when I started this project so I had to purchase one. I'd never used one before and didn't do any reading on what to think about when purchasing one etc. Using a staple gun is quite hard, or at least the one I have is. Buying a pneumatic staple gun for just this project is probably overkill, but if you have one or can borrow one I reckon it would make the build go faster and easier.
Hanging the panels
I've hung the panels on my wall using four heavy duty brackets on each frame. I've not screwed the brackets directly into any stud partitions but I've used special wall fixings for plasterboard so the weight shouldn't be an issue. I've also used some short screws to screw the brackets into the panels. So they are solid and shouldn't move.
When I was doing my research on acoustic panels, lots of people mentioned mounting the panel away from the wall, so not flat against the wall. This I believe is called an air gap, and allows the sound to travel around the back of the panel and also be absorbed. As far as I can understand it this helps the low-frequency absorption. So I've got my panels about a 1/4 inch away from the wall.
Results
Let's head over to the finally piece of this puzzle and look at the results.