Filter Azure costs by Tags
Learn how to use tags in Azure Cost Management to filter and analyse cloud expenses, optimize costs, and streamline budgeting.

Managing expenses is crucial, whether you're purchasing a new mobile phone or analysing your cloud spending.
In the realm of cloud services, understanding and breaking down your costs can be complex yet essential for effective budgeting and resource allocation.
Azure provides a powerful way to manage and analyse these costs through the use of tags. By tagging your resources, you can filter and display costs in a more meaningful and organized manner. Let's delve into how you can leverage tags in Azure Cost Management to gain deeper insights into your cloud expenses.
Understanding Tags in Azure
Tags are key-value pairs that can be applied to Azure resources, resource groups, and subscriptions. They are essential for organising and managing resources based on different criteria such as environment (e.g., development, staging, production), department, project, or cost centre. For example, you might tag resources with `Project: Alpha` to group all resources related to the Alpha project.
Benefits of Using Tags
Using tags has several benefits:
- Organisation: Easily categorise and locate resources.
- Cost Allocation: Assign costs to specific projects, departments, or teams.
- Automation: Automate resource management tasks based on tags.
- Reporting: Generate detailed reports and insights based on tags.
Viewing costs by Tags in Azure Cost Management
Azure Cost Management is a suite of tools that helps you monitor, allocate, and optimise your Azure spend. It provides detailed insights into your usage and costs, allowing you to identify trends, anomalies, and opportunities for optimization.
To view the costs of all resources with a specific tag, follow these steps:
- Log in to the Azure portal
- In the left-hand menu, select “Cost Management + Billing”
- Under the “Cost Management” section, click on “Cost analysis”
In the Cost analysis view, you’ll see various filters at the top of the page.
- Click on the “Add filter” option
- In the dropdown, select “Tag”
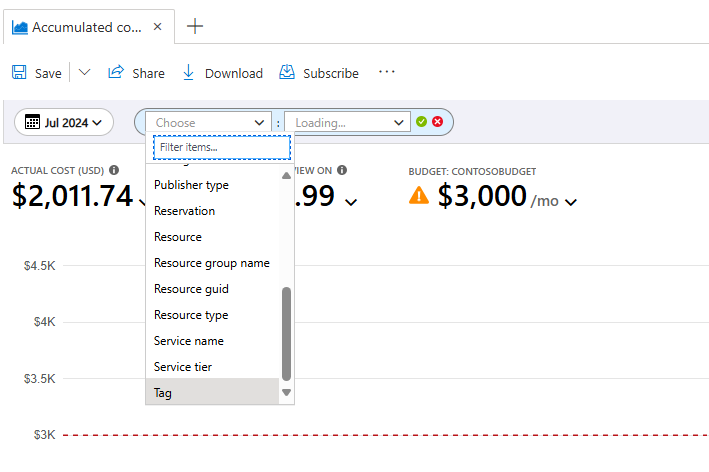
- Enter the key and value of the tag you want to filter by. For example, if you want to see costs for all resources tagged with `demo_cost_centre:2000222`, select “demo_cost_centre” as the key and “2000222” as the value.
- Once you apply the filter, Azure Cost Management will display the costs associated with the tagged resources.
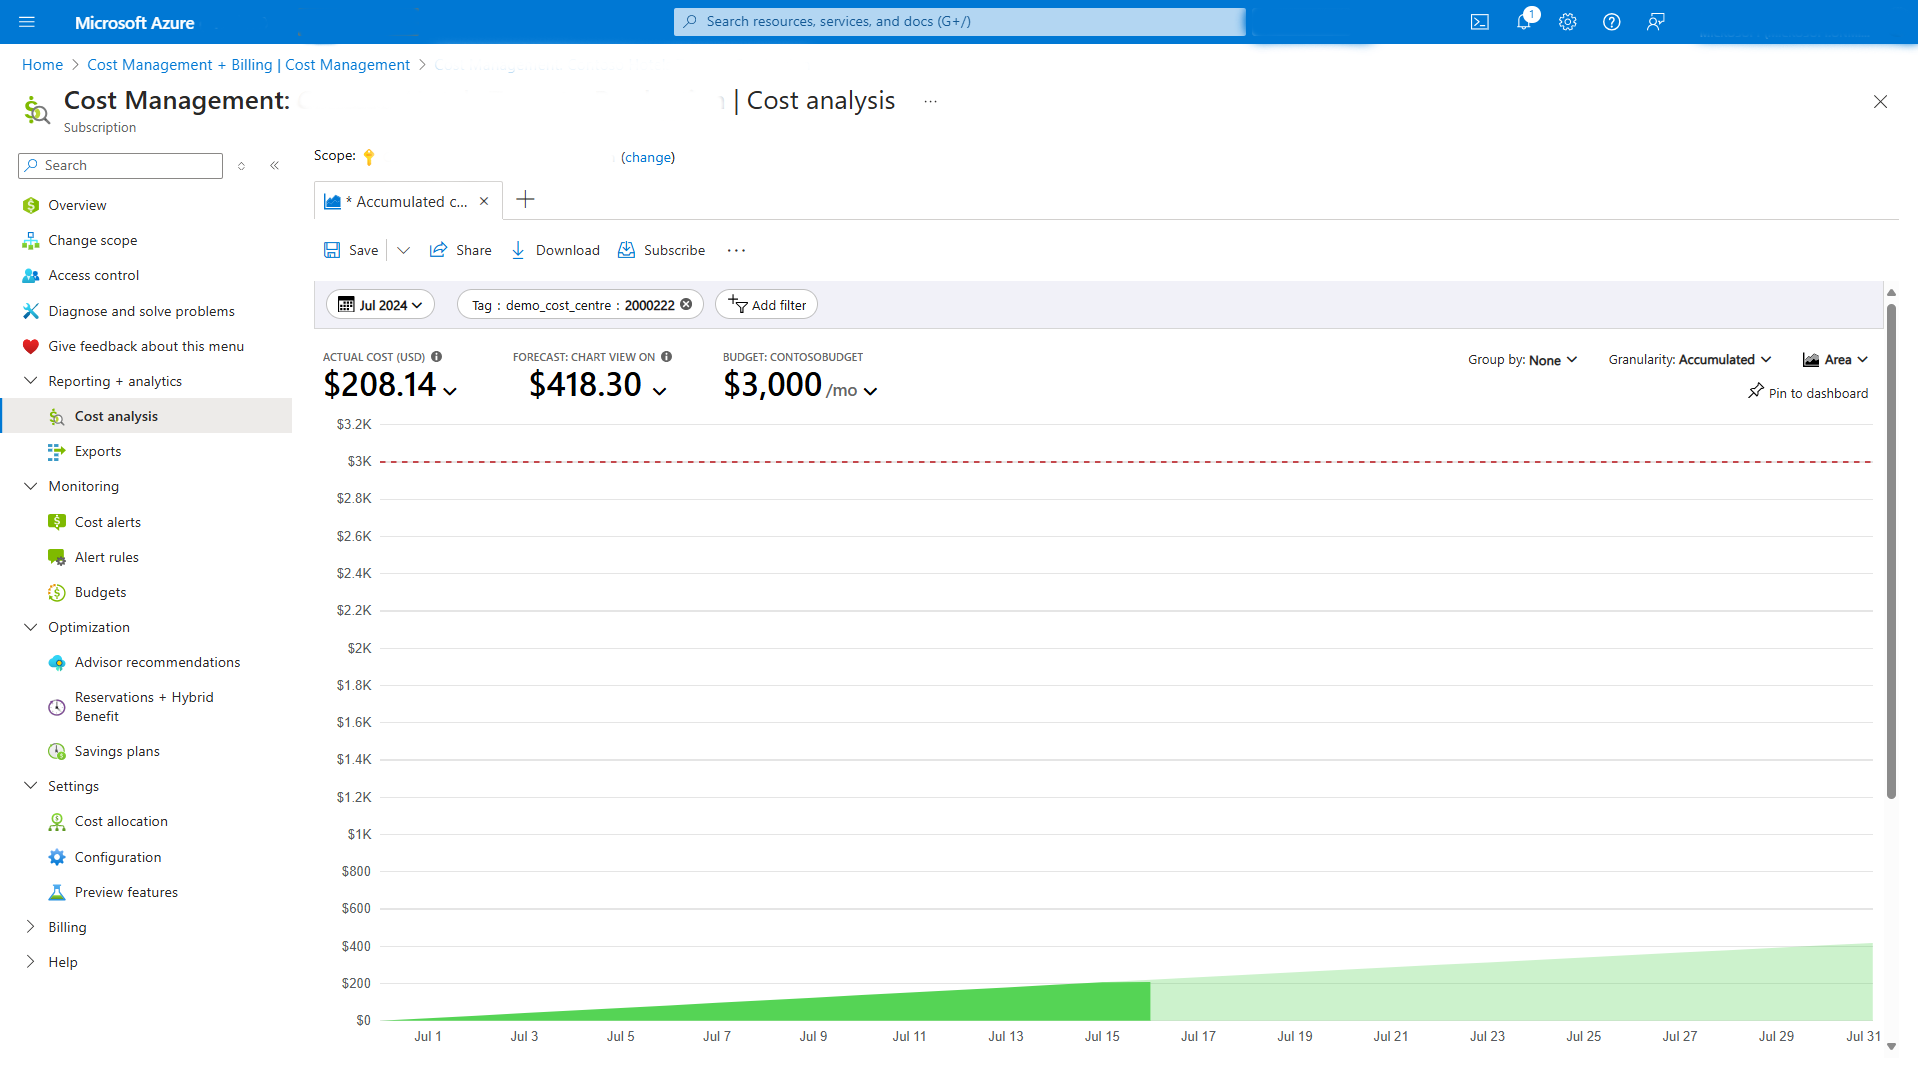
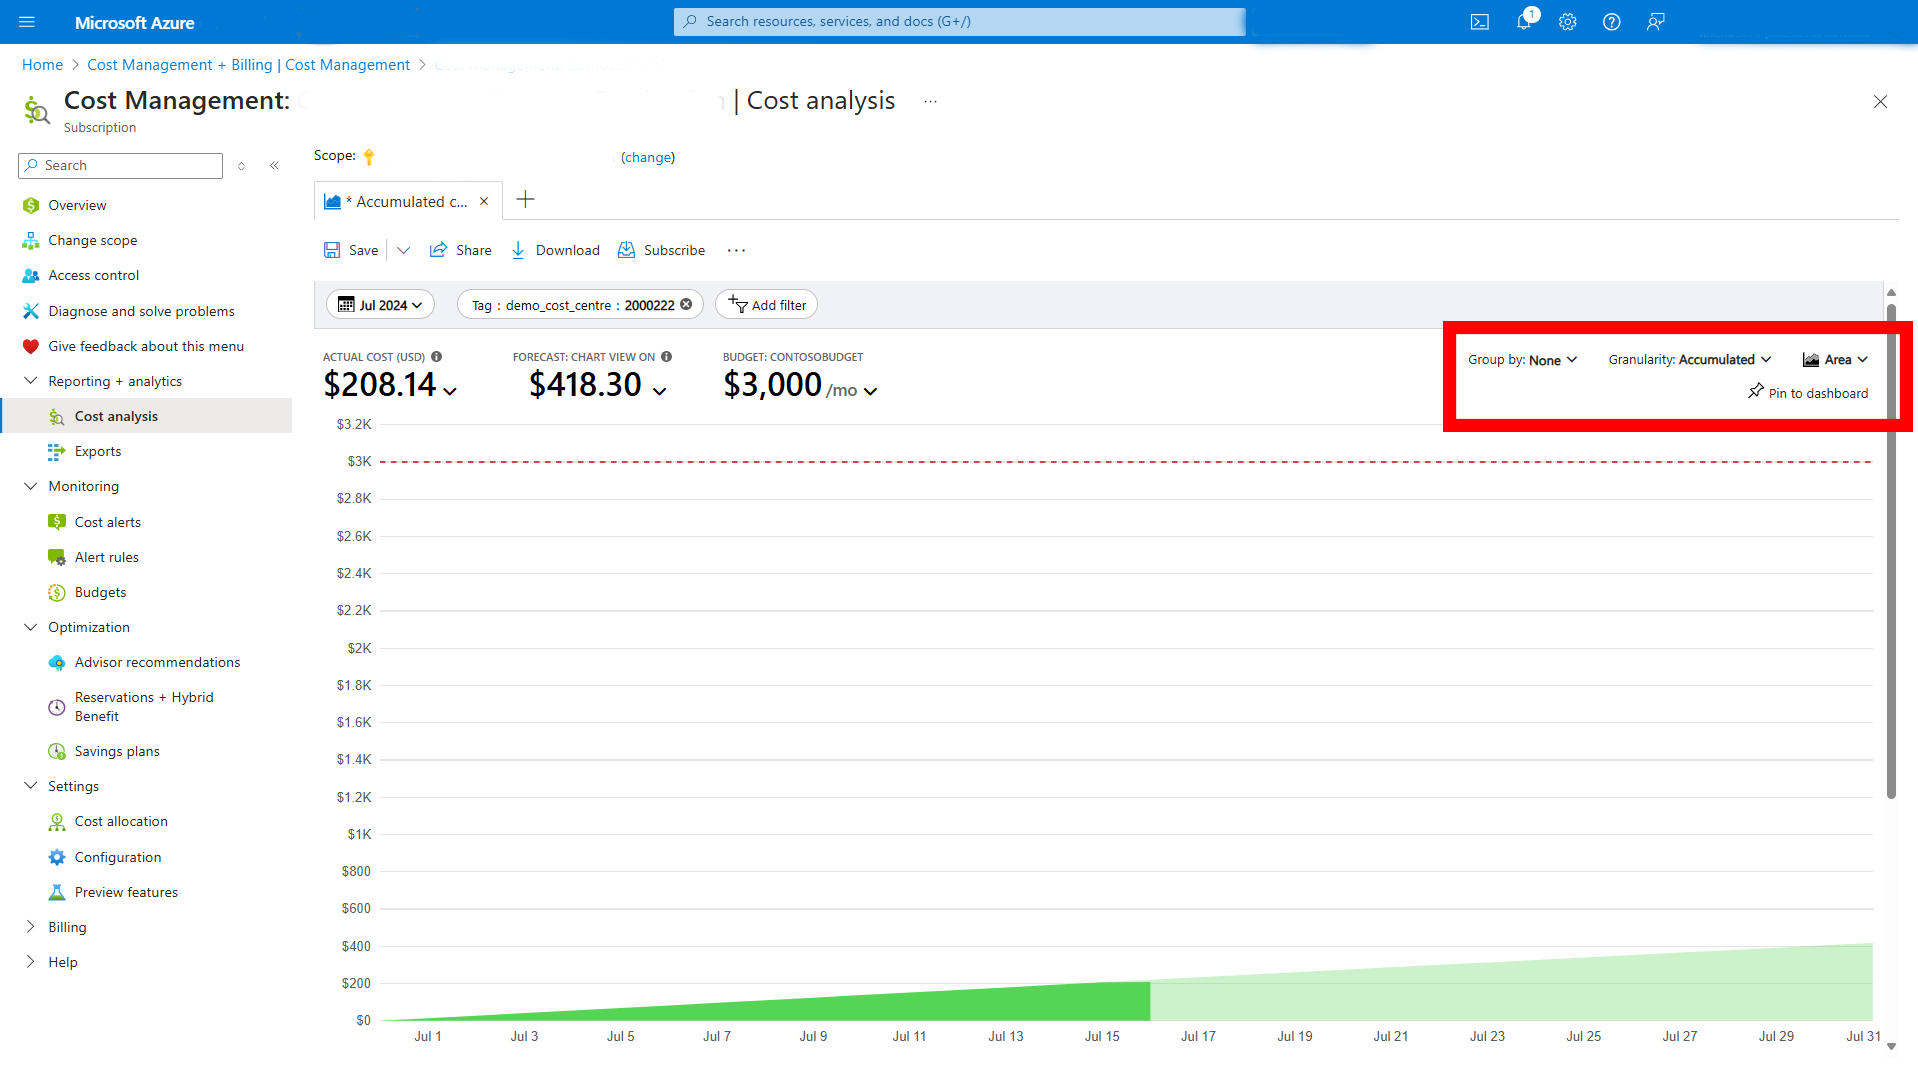
- You can customise the view by selecting different date ranges, grouping options, and visualisation types (e.g., charts, tables).
If you’d like to download and share this report with colleagues you can do.
- Click on the “Download” button to download the report in a CSV format.
- You can also create and schedule automated reports to be sent via email to stakeholders.
Advanced Tagging Strategies
To maximise the benefits of tagging and cost management, consider the following strategies:
- Standardise Tagging Conventions: Establish a consistent tagging policy across your organisation to ensure tags are applied uniformly.
- Automate Tagging: Use Azure Policy and automation scripts to enforce tagging requirements and automatically tag resources.
- Review and Clean Up Tags Regularly: Periodically audit your tags to ensure they are up-to-date and relevant.
Conclusion
Using Azure Cost Management in conjunction with tags is a powerful way to gain insights into your cloud spending. By filtering costs based on tags, you can allocate expenses accurately, identify cost-saving opportunities, and make data-driven decisions. Implementing a robust tagging strategy and leveraging the analytical capabilities of Azure Cost Management will help you optimise your Azure resources and control costs effectively.