Install Terraform in the AWS CloudShell
A step by step guide on how to install Terraform within the AWS CloudShell.

The AWS CloudShell is a browser-based shell that makes it quick and easy for you to securely manage, explore and interact with your AWS resources.
CloudShell is pre-authenticated with your console credentials, so there is no need to login again.
Tools such as AWS CLI, Python, Node.js, npm, Git and BASH utilities are pre-installed for ease of use.
Unfortunately Terraform isn’t installed, however, in this article I am going to walk you through the process of installing it within AWS CloudShell.
Install Terraform in AWS CloudShell
- Head over to the AWS Management Console
- Click on the AWS CloudShell icon on the console navigation bar

- We’re going to use the Terraform Version Manager to help install Terraform
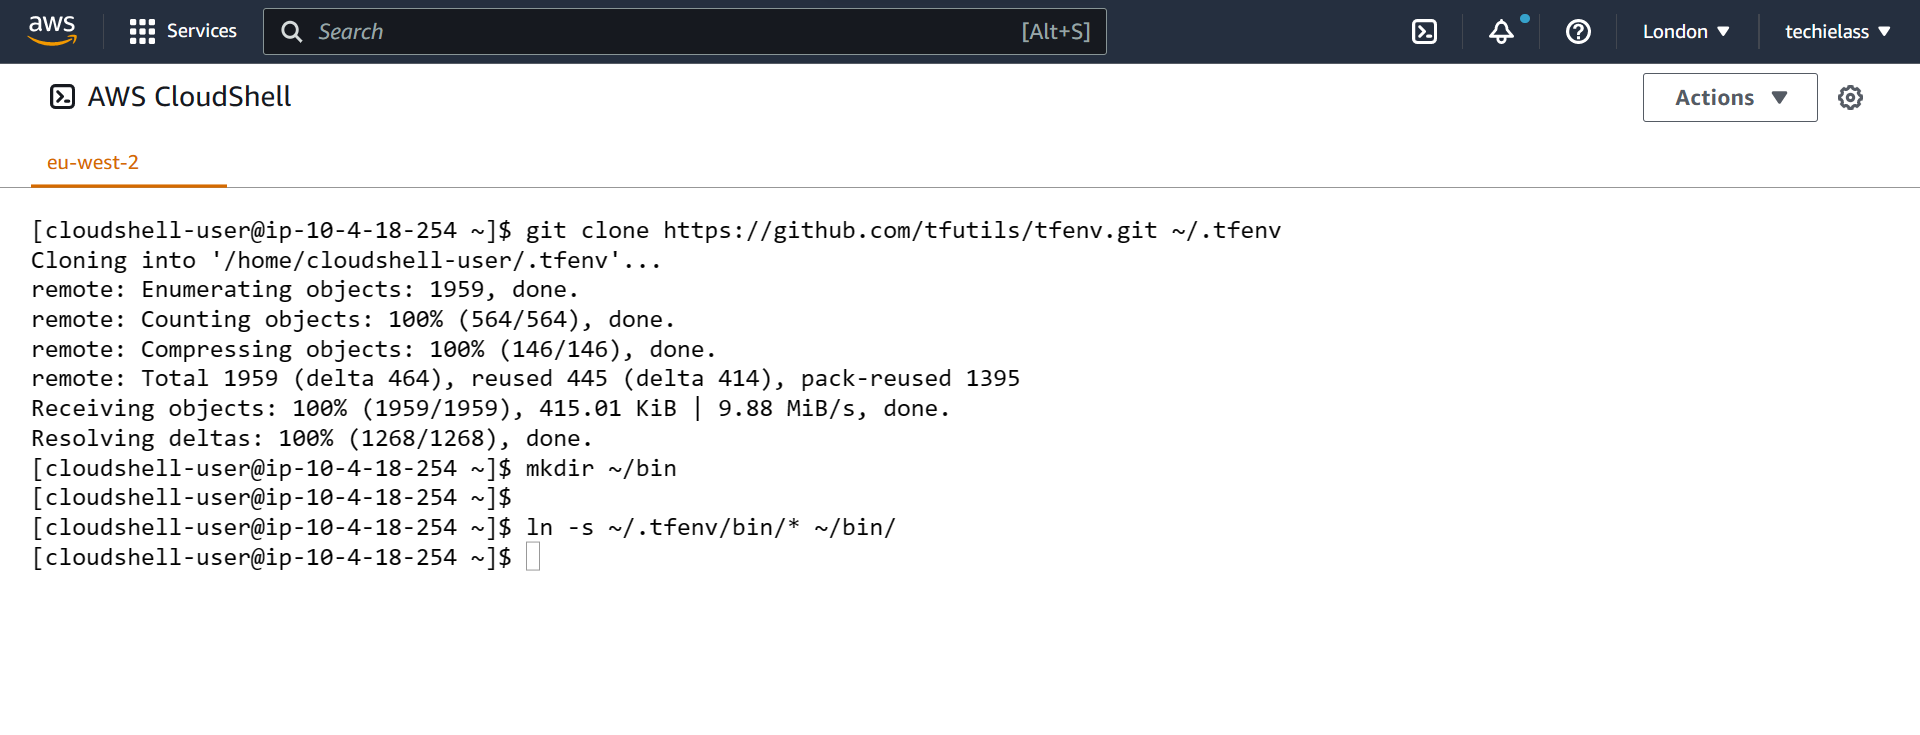
- With the AWS CloudShell type in:
git clone https://github.com/tfutils/tfenv.git ~/.tfenv

- Next we want to make a new directory called ~/bin, to do that issue the command:
mkdir ~/bin
- Now we’re going to make a symlink for tfenv/bin/* scripts into the path ~/bin by typing the command:
ln -s ~/.tfenv/bin/* ~/bin/

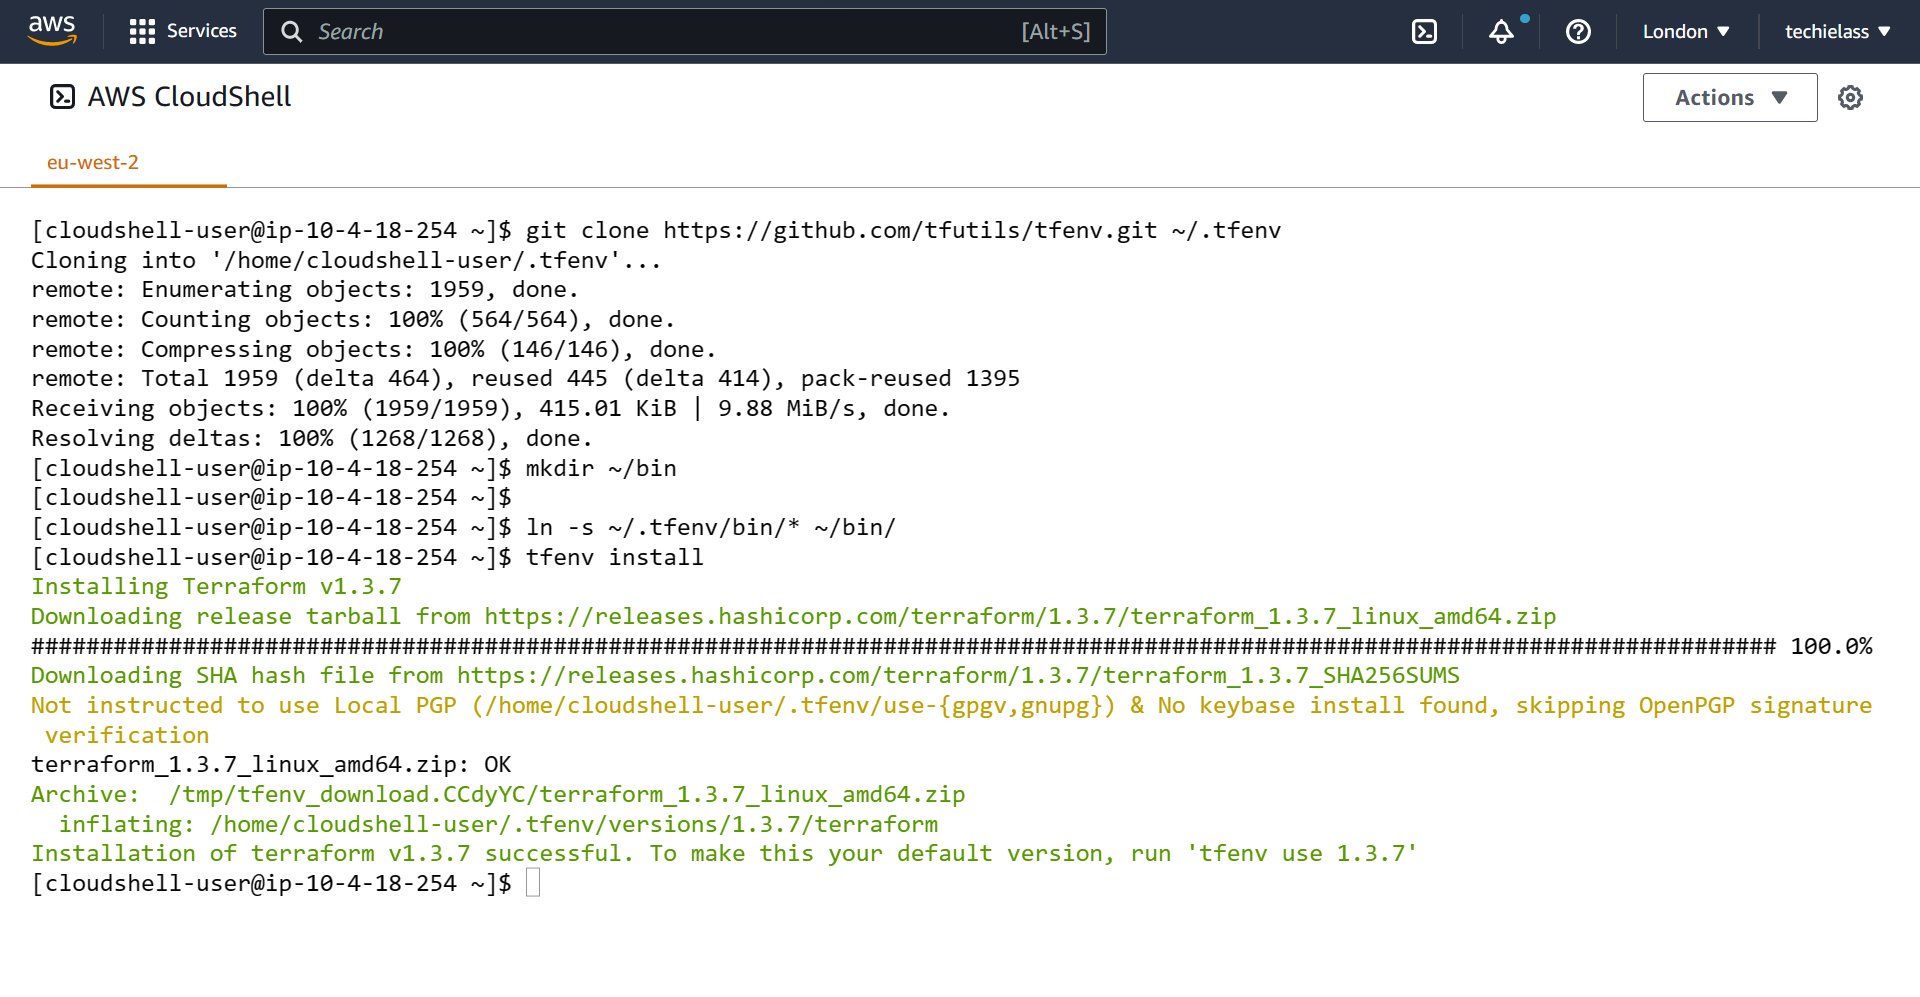
- With the Terraform Version Manager installed, we can now install Terraform. Type in the command:
tfenv install

This will install the latest version of Terraform for you. You can specify a specific version if required when using the tfenv install command.
If you wish to use the latest version of Terraform as default you can use the command:
tfenv use 1.3.7
It’s worth noting that this only installs Terraform within the AWS CloudShell region that you are working within. If you use multiple AWS regions then you will need to follow the above steps each time.
A copy of all the steps are all encapsulated within a script here.
You can now work with Terraform within the AWS CloudShell console.
