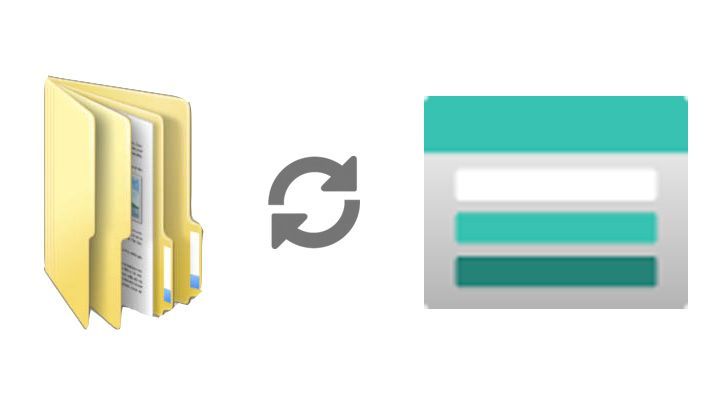
Sync files from on prem to Azure Storage

For those that have been following me of late you'll know I am in the process of changing my PC. As part of that project I need to make sure all my files, the important stuff is stored somewhere safe. And let's be honest it's also an exercise in tidying things up and making sure I know where everything is.
For me, and I'm sure everyone reading this the most important files they have is pictures. Family memories, trip memories, daft memories from your phone cameras etc. And let's all be honest, we probably don't put enough effort into sorting, cataloging or backing up those precious memories out. Which is ultimately where I am.
I want to make sure my photo memories are stored somewhere secure and safe. Now there are tons of choices for this. You could go down the NAS device route and store everything in your house, you could use Microsoft OneDrive, you could use Azure File Share, you could use another cloud providers storage options. There are any number out there. My choosen option is to use Azure Storage.
I'm using plain old blob storage, with the Archive tier turned on and with geo redundancy turned on. For me and my purposes, of just storing my photos somewhere safe and secure it's the best option. I don't have to care about the hardware running, the security is taken care of etc.
What I want to take you through is the process of getting the data from my PC up into Azure. 😀
Creating the Azure storage
Sync the Files
Now you've created your destination you need to start to transfer the files from on prem into Azure. I am going to do that using [PowerShell] and AzCopy. These are utilities that can be easily installed on your computer if you don't already have them installed.
Before you can transfer the files up you need to gather a couple of pieces of information from your Azure account.
Azure Storage File Path
You need to get the file path of your storage account. The file path is made up of the name you gave it in the step above and a default path.
https://NAMEYOUGAVEIT.blob.core.windows.net
This is the main location of your storage account. If like me you want to split your files into separate folders, or containers you need to include the container name.
https://NAMEYOUGAVEIT.blob.core.windows.net/CONTAINERNAME
So my storage file path will be https://sarahsphotos.blob.core.windows.net/2020-photos
Shared Access Signature
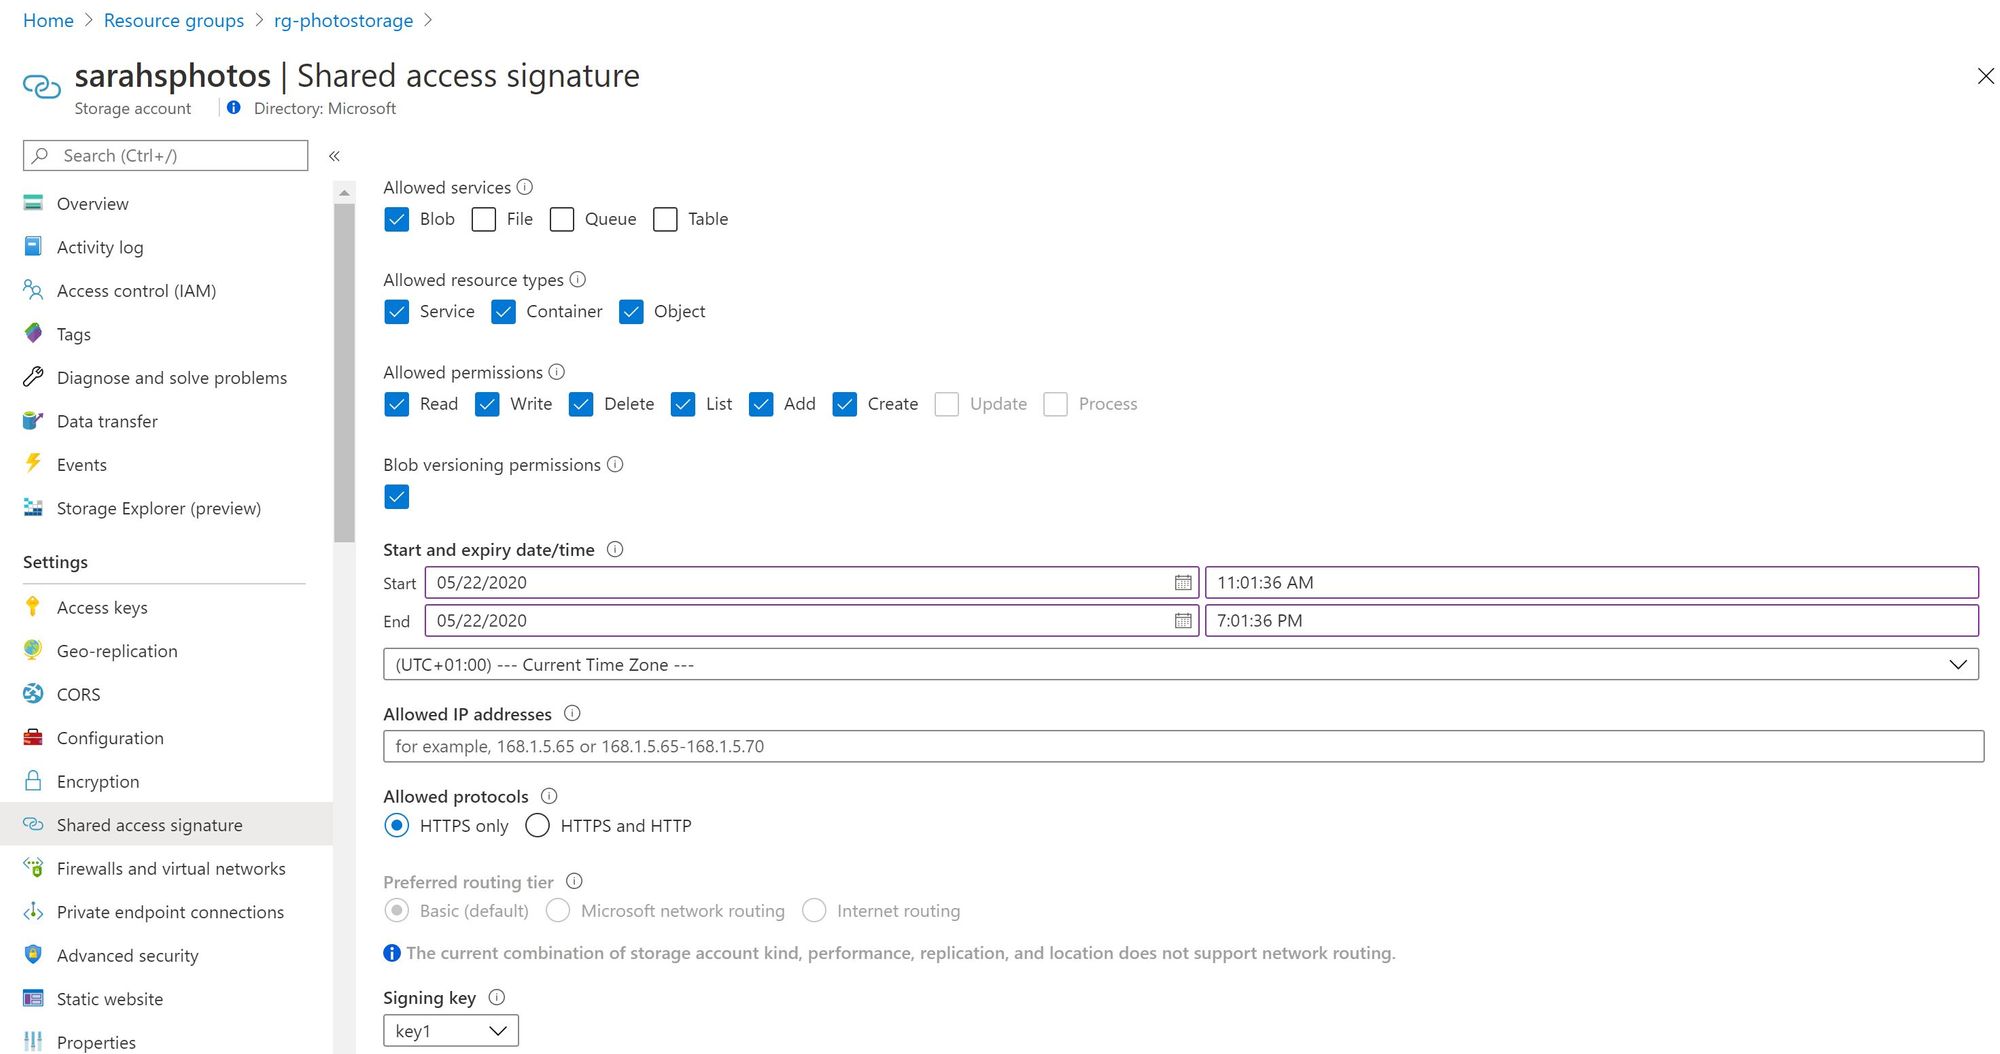
We've created this storage account as a private one, that only those authorised to can access it. So in order to copy files we need to create a Shared Access Signature (SAS), so we can transfer the files across in a programmatic way. To do this go into the Azure Portal, click on your storage account and then down the left hand navigation bar you will see Shared Access Signature. When you enter this blade you will be given a lot of options, I configure the options as below, modifying the time to suit when I plan to do the work.
Once you've configured the options, click on Generate SAS and connection string. This will generate a lot of options, you want to copy the SAS Token string.
Time to Sync
Now you have the information you want to piece it together and copy the files. The command looks like this:
azcopy sync "Location on prem" "Azure Storage File Path + SAS Token"
So I would use the command:
Don't worry this is a dummy SAS token and storage account. 😉
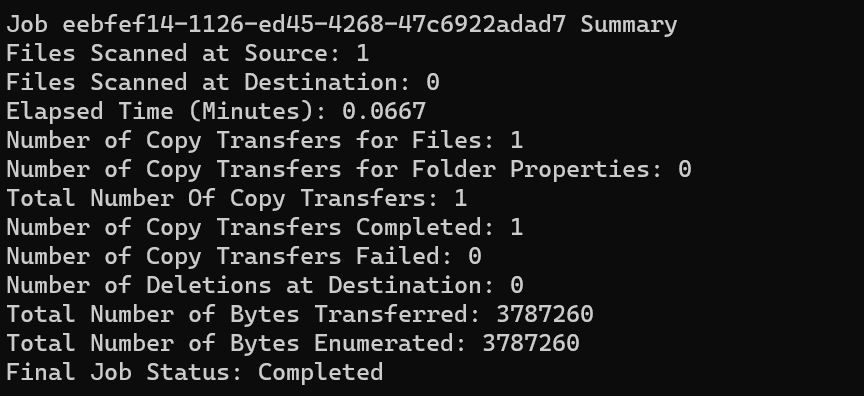
You can take this command and run it within a PowerShell console on your local PC and you should get results similar to this when the job completes.
I've found more photos for that storage area!
So you now have the files copy up to Azure from on prem, but you start to add more files into that location on prem and want to get them up to Azure as well. Now this is the beauty of the AzCopy Sync command, it helps to compare modified times so should only ever add in those new files or files that have changed, meaning you don't have to sync everything each time you add something new to that on prem folder. 😉
So you can run the same command as above and it will run through the files that have changed and only add them to the Azure storage.
